はじめに
こんにちは。
Kojirockの1人アドベントカレンダー Advent Calendar 2018の19日目の記事です。
プライベートが忙しくて、最近は日付が変わってからのアップがデフォルトです。

Nuxt.jsビギナーズガイド―Vue.js ベースのフレームワークによるシングルページアプリケーション開発
- 作者: 花谷拓磨
- 出版社/メーカー: シーアンドアール研究所
- 発売日: 2018/10/17
- メディア: 単行本(ソフトカバー)
- この商品を含むブログを見る
今回は、2章、3章のはじめあたりを中心に勉強しました。
やってみた
1. 以前のソースのリクエスト部分をvuexへ移す
本書で紹介されている、vuxeストアのクラシックモードを使用して、以前の天気予報取得ロジックをstoreに移動します。
store/index.js
import Vuex from 'vuex'

export default () =>
  new Vuex.Store({
    state: {
      weatherData: ''
    },

    getters: {
      weatherData: state => state.weatherData
    },

    mutations: {
      setWeatherData(state, weatherData) {
        state.weatherData = weatherData
      }
    },

    actions: {
      async fetchWeatherData({ commit }, { pref }) {
        const url = `https://api.openweathermap.org/data/2.5/weather?q=${pref}&APPID=${
          process.env.OPENWEATHERMAP_API_KEY
        }`
        const response = await this.$axios.$get(url)
        commit('setWeatherData', response.weather[0].main)
      }
    }
  })
pages/weather/_pref.js
<template>
  <div>
    <p>只今の{{ prefName }}の天気</p>
    <span>{{ weatherName }}です</span>
  </div>
</template>

<script>
import { mapGetters } from 'vuex'
export default {
  data() {
    return {
      weatherTypeList: {
        Clouds: '曇り',
        Rain: '雨',
        Snow: '雪',
        Clear: '晴れ'
      },
      availablePrefList: {
        aomori: '青森',
        saitama: '埼玉',
        osaka: '大阪',
        hiroshima: '広島',
        okinawa: '沖縄'
      }
    }
  },
  validate({ params }) {
    return (
      ['aomori', 'saitama', 'osaka', 'hiroshima', 'okinawa'].indexOf(
        params.pref
      ) !== -1
    )
  },

  async fetch({ store, params }) {
    try {
      await store.dispatch('fetchWeatherData', { pref: params.pref })
    } catch (e) {
      console.log(e)
    }
  },

  computed: {
    weatherName: function() {
      return this.weatherTypeList[this.weatherData]
    },
    prefName: function() {
      return this.availablePrefList[this.$route.params.pref]
    },
    ...mapGetters(['weatherData'])
  }
}
</script>

Vue Dev Toolでstoreの情報も確認できるのですが、きちんとデータが入っていました。
2. Layoutを切り替える
デフォルトのlayoutを使わずに、別途新しいLayoutファイルを作ってそれを適用してみます。
今回は、UI フレームワークの Element UIのヘッダー・フッダー・サイドバーを表示するようなlayoutを作成してみます。
使用しているのは、Element UIの公式に乗っているものとほぼほぼ一緒です。
components/KrHeader.vue
<template>
  <el-header>
    Kojirock Header
  </el-header>
</template>

<style>
.el-header {
  background-color: #b3c0d1;
  color: #333;
  text-align: center;
  line-height: 60px;
}
</style>
components/KrFooter.vue
<template>
  <el-footer>
    Kojirock Footer
  </el-footer>
</template>

<style>
.el-footer {
  background-color: #b3c0d1;
  color: #333;
  text-align: center;
  line-height: 60px;
  margin-top: auto;
}
</style>
components/KrSideMenu.vue
<template>
  <el-aside width="200px">
    Side Menu
  </el-aside>
</template>

<style>
.el-aside {
  background-color: #d3dce6;
  color: #333;
  text-align: center;
  line-height: 200px;
}
</style>
layouts/kojirock.vue
<template>
  <el-container>
    <el-container>
      <k-r-side-menu />
      <el-container id="kr-main">
        <k-r-header />
        <el-main><nuxt/></el-main>
        <k-r-footer />
      </el-container>
    </el-container>
  </el-container>
</template>

<script>
import KRHeader from '~/components/KRHeader.vue'
import KRFooter from '~/components/KRFooter.vue'
import KRSideMenu from '~/components/KRSideMenu.vue'
export default {
  components: {
    KRHeader,
    KRFooter,
    KRSideMenu
  }
}
</script>

<style>
#kr-main {
  display: flex;
  flex-direction: column;
  min-height: 100vh;
}
</style>
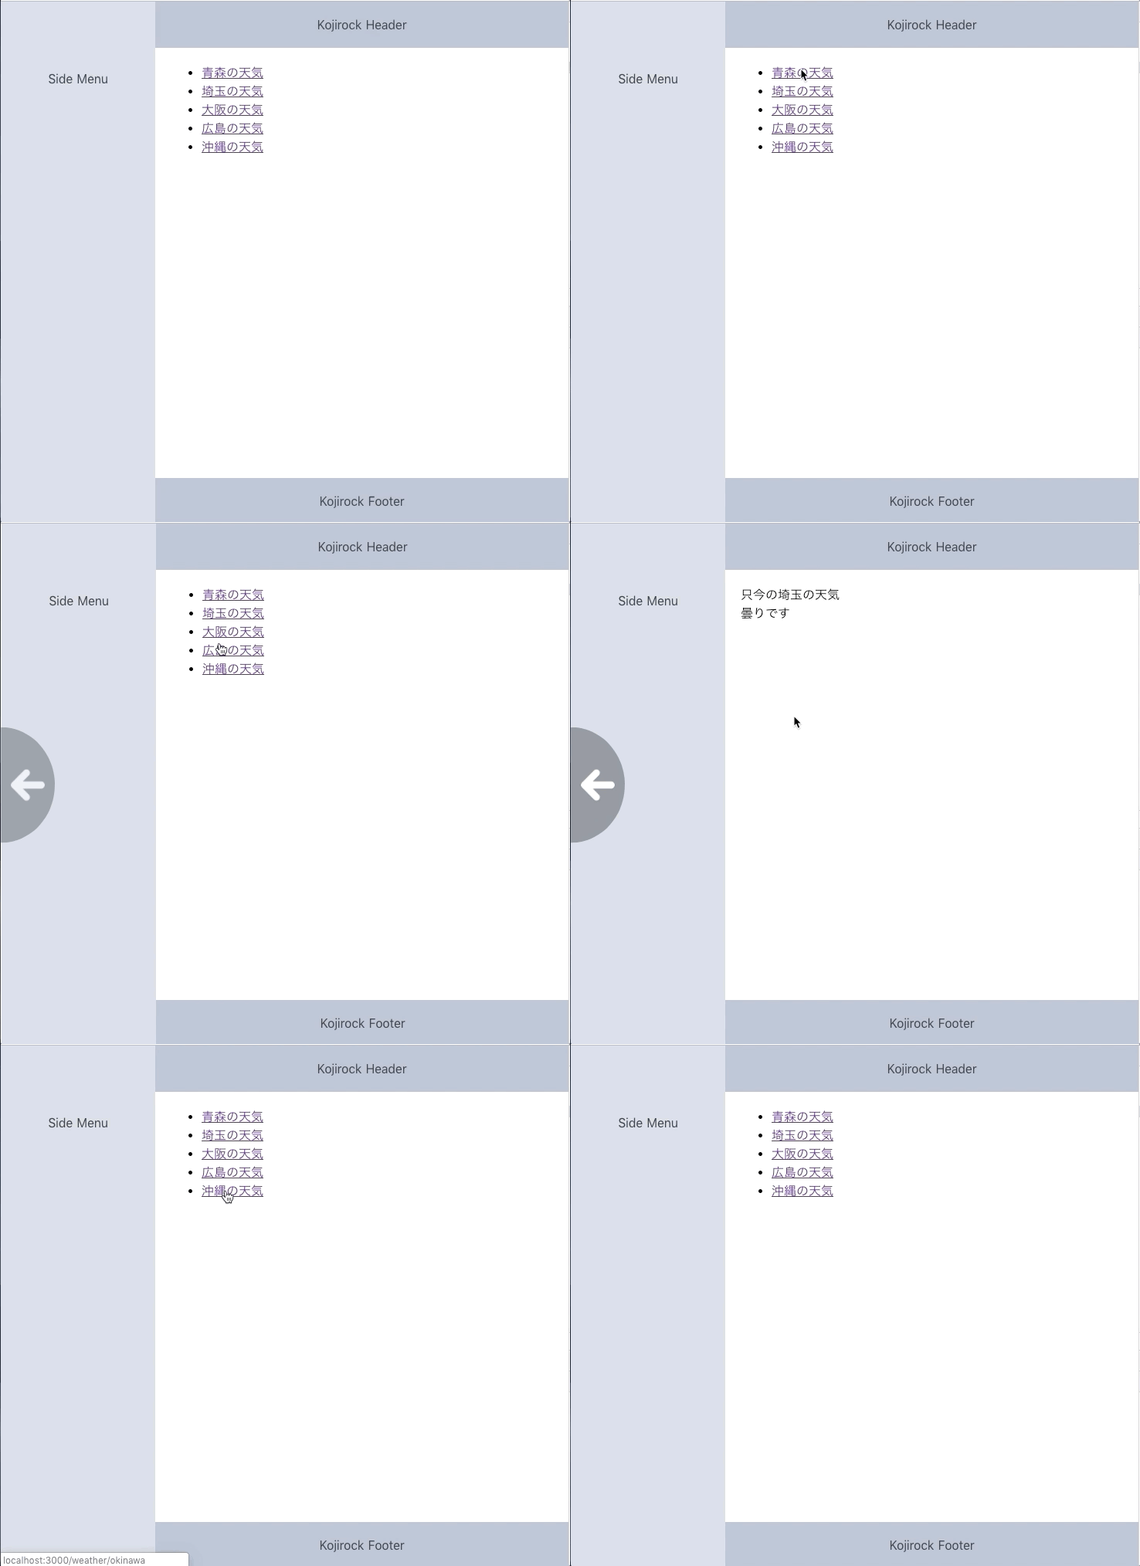
作成したlayoutファイルを先程まで作っていた天気予報のページコンポーネントに適用します。

↑のような感じで設定すると、こんな感じで適用されます。

終わりに
今日は時間がなかったので、これで終わります。
次はライフサイクル周りと、ミドルウェア関連になります。
牛歩だけど進まねば。
お疲れ様でした。